Download ShellExView – Free for Windows PC (2026)
View, manage, and disable Windows shell extensions in seconds. Fix slow right-click menus, stop Explorer crashes, and take control of every context menu handler on your system.
| Extension Name | Type | Company | Version | |
|---|---|---|---|---|
| Shell Folders | Shell Folder | Microsoft | 10.0.22631 | |
| Windows Search | Context Menu | Microsoft | 7.0.22621 | |
| NVIDIA CPL Extension | Context Menu | NVIDIA Corp. | 31.0.15.5250 | |
| Pin to Taskbar | Context Menu | Microsoft | 10.0.22631 | |
| Google Drive Shell Ext | Icon Overlay | Google LLC | 92.0.2.0 | |
| 7-Zip Shell Extension | Context Menu | Igor Pavlov | 24.09 | |
| Dropbox Shell Extension | Icon Overlay | Dropbox Inc. | 210.4.5688 | |
| Property System | Property Handler | Microsoft | 7.0.22621 |
What Is ShellExView?
A lightweight Windows tool from NirSoft that reveals every shell extension on your PC and lets you control them one by one.
ShellExView is a free portable utility developed by Nir Sofer at NirSoft. It scans your Windows installation and displays a complete list of every shell extension registered on the system. Shell extensions are small programs that plug into Windows Explorer and modify its behavior — they add items to your right-click context menu, change folder icons, insert columns into file listings, and handle thumbnail previews, among dozens of other functions.
The problem with shell extensions is that they accumulate over time. Every application you install can register one or more of them, and poorly coded extensions are a common cause of slow right-click menus, Windows Explorer crashes, and general sluggishness when browsing files. ShellExView gives you visibility into this hidden layer of your operating system and the ability to disable the extensions causing problems.
Why Users Rely on ShellExView
The tool is popular among IT professionals, system administrators, and advanced users who need to troubleshoot Explorer-related issues. When a right-click takes 5 to 10 seconds to appear, the usual suspect is a misbehaving shell extension. ShellExView makes diagnosis straightforward: sort by company name, hide all Microsoft entries, and disable third-party extensions one at a time until the problem disappears.
How It Compares to Built-In Tools
Windows has no built-in interface for viewing or managing shell extensions. The only native option is manually navigating the registry with Regedit, which requires you to know the exact CLSID keys and is both tedious and risky. ShellExView replaces that process with a simple list view that shows extension name, type, file path, company, version, and digital signature status. Disabling an extension takes a single click or keyboard shortcut, and re-enabling it is just as simple.
Version 2.01 supports Windows from XP through Windows 11, works on both 32-bit and 64-bit systems, and the entire program fits in a ZIP file under 140 KB. There is nothing to install — you extract and run it.
Key Features
Everything you need to inspect, manage, and fix Windows shell extensions in one portable tool.
Complete Extension Inventory
Lists every registered shell extension with CLSID, file path, company name, version number, description, and creation date. Nothing hides from this scan — even disabled or broken entries show up.
One-Click Disable/Enable
Select any extension and press F7 to disable it or F8 to re-enable it. Changes take effect after an Explorer restart, which ShellExView can trigger automatically. Batch operations let you disable multiple extensions at once.
22+ Extension Types Detected
Covers context menus, icon overlays, property sheets, drag-drop handlers, thumbnail handlers, column handlers, copy hook handlers, preview handlers, infotip handlers, shell folders, browser helper objects, and more.
Suspicious Extension Highlighting
Extensions with missing files, unsigned code, or unusual attributes are automatically highlighted in pink. This helps you spot potential problems — or malware — without manually checking each entry.
Hide Microsoft Extensions
One checkbox hides all built-in Windows extensions, letting you focus on third-party additions. Since most Explorer problems come from third-party code, this filter saves significant troubleshooting time.
Digital Signature Verification
Checks each extension for a valid digital signature from a trusted publisher. Unsigned or tampered extensions are flagged, which helps identify software that might have been modified or installed from an unverified source.
Restart Explorer In-Place
After disabling or enabling extensions, restart Windows Explorer directly from the Options menu. No need to log out, reboot, or use Task Manager — the change applies in seconds.
Export to CSV, XML, HTML
Save the full extension list in multiple formats for documentation, comparison, or analysis. Useful for IT teams tracking which extensions are installed across workstations or building baseline configurations.
Remote Computer Scanning
Connect to other Windows machines on your network and view their shell extensions remotely. This is valuable for sysadmins managing multiple desktops who need to diagnose Explorer problems without walking to each PC.
Command-Line Automation
Full CLI interface for scripting disable/enable operations, running exports, and performing remote scans. You can integrate ShellExView into login scripts, GPO startup routines, or batch maintenance workflows.
50+ Language Translations
Download a small INI file for your language and drop it next to the executable. The interface switches immediately — no reinstallation needed. Community-maintained translations cover major European, Asian, and Middle Eastern languages.
Zero-Install Portable Operation
The entire program is a single 120 KB executable plus one help file. Run it from a USB drive, a shared network folder, or a temp directory. It writes nothing to the registry and leaves no traces on the host system.
System Requirements
ShellExView runs on virtually any Windows machine with minimal resources.
| Component | Minimum | Recommended |
|---|---|---|
| Operating System | Windows XP SP3 | Windows 10 or 11 (64-bit) |
| Processor (CPU) | Any x86 or x64 processor | 1 GHz or faster |
| RAM | 256 MB | 1 GB or more |
| Disk Space | Under 1 MB (portable) | Under 1 MB |
| Display | 800 x 600 | 1024 x 768 or higher |
| Privileges | Administrator (Vista+) | Administrator |
| Network | Not required | Required for remote scanning only |
ShellExView v2.01 ships as a ZIP archive. Use the 64-bit version (~140 KB) on modern Windows 10/11 systems and the 32-bit version (~120 KB) on older machines or for scanning 32-bit shell extensions specifically.
Download ShellExView 2.01
Get the right version for your system. Both are portable — extract the ZIP and run.
Windows 64-bit
Download 64-bitWindows 32-bit
Download 32-bitBoth versions download directly from NirSoft. Extract the ZIP to any folder and run shexview.exe. No installation wizard, no registry changes, no admin setup required beyond running as administrator on Vista and later.
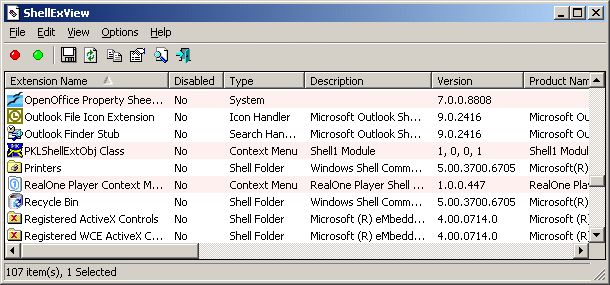
Screenshots
See how ShellExView looks in action on a real Windows system.

Getting Started with ShellExView
From download to your first disabled extension in under five minutes. Here is everything you need to know.
Downloading ShellExView
Head to our download section and grab the version that matches your system architecture. If you are running a modern 64-bit copy of Windows 10 or Windows 11, choose the 64-bit ZIP (~140 KB). On older 32-bit machines running Windows XP, Vista, or 7, pick the 32-bit ZIP (~120 KB). If you are not sure which architecture you have, press Win + Pause and check the “System type” line — it will say either “64-bit operating system” or “32-bit operating system.”
The download is a standard ZIP file, not an installer. There is no setup wizard, no license agreement screen, and no bundled toolbars. The ZIP contains just the executable (shexview.exe), a help file (shexview.chm), and optionally a readme. The entire package is under 150 KB — smaller than most icons.
Extraction and First Launch
Extract the ZIP to any folder you like. A common choice is C:\Tools\ShellExView\ or a dedicated utilities folder on a USB drive. There is no install process — you are extracting, not installing. The program runs directly from wherever you put it.
Right-click shexview.exe and select Run as administrator. Administrator privileges are required on Windows Vista and later because ShellExView needs to read and write registry keys in the HKEY_LOCAL_MACHINE hive. Without admin rights, you can still view extensions but cannot disable or enable them.
On first launch, ShellExView automatically scans your system and populates the list. On a typical Windows 10/11 machine, you will see 200 to 400 registered shell extensions. The scan takes 2 to 5 seconds.
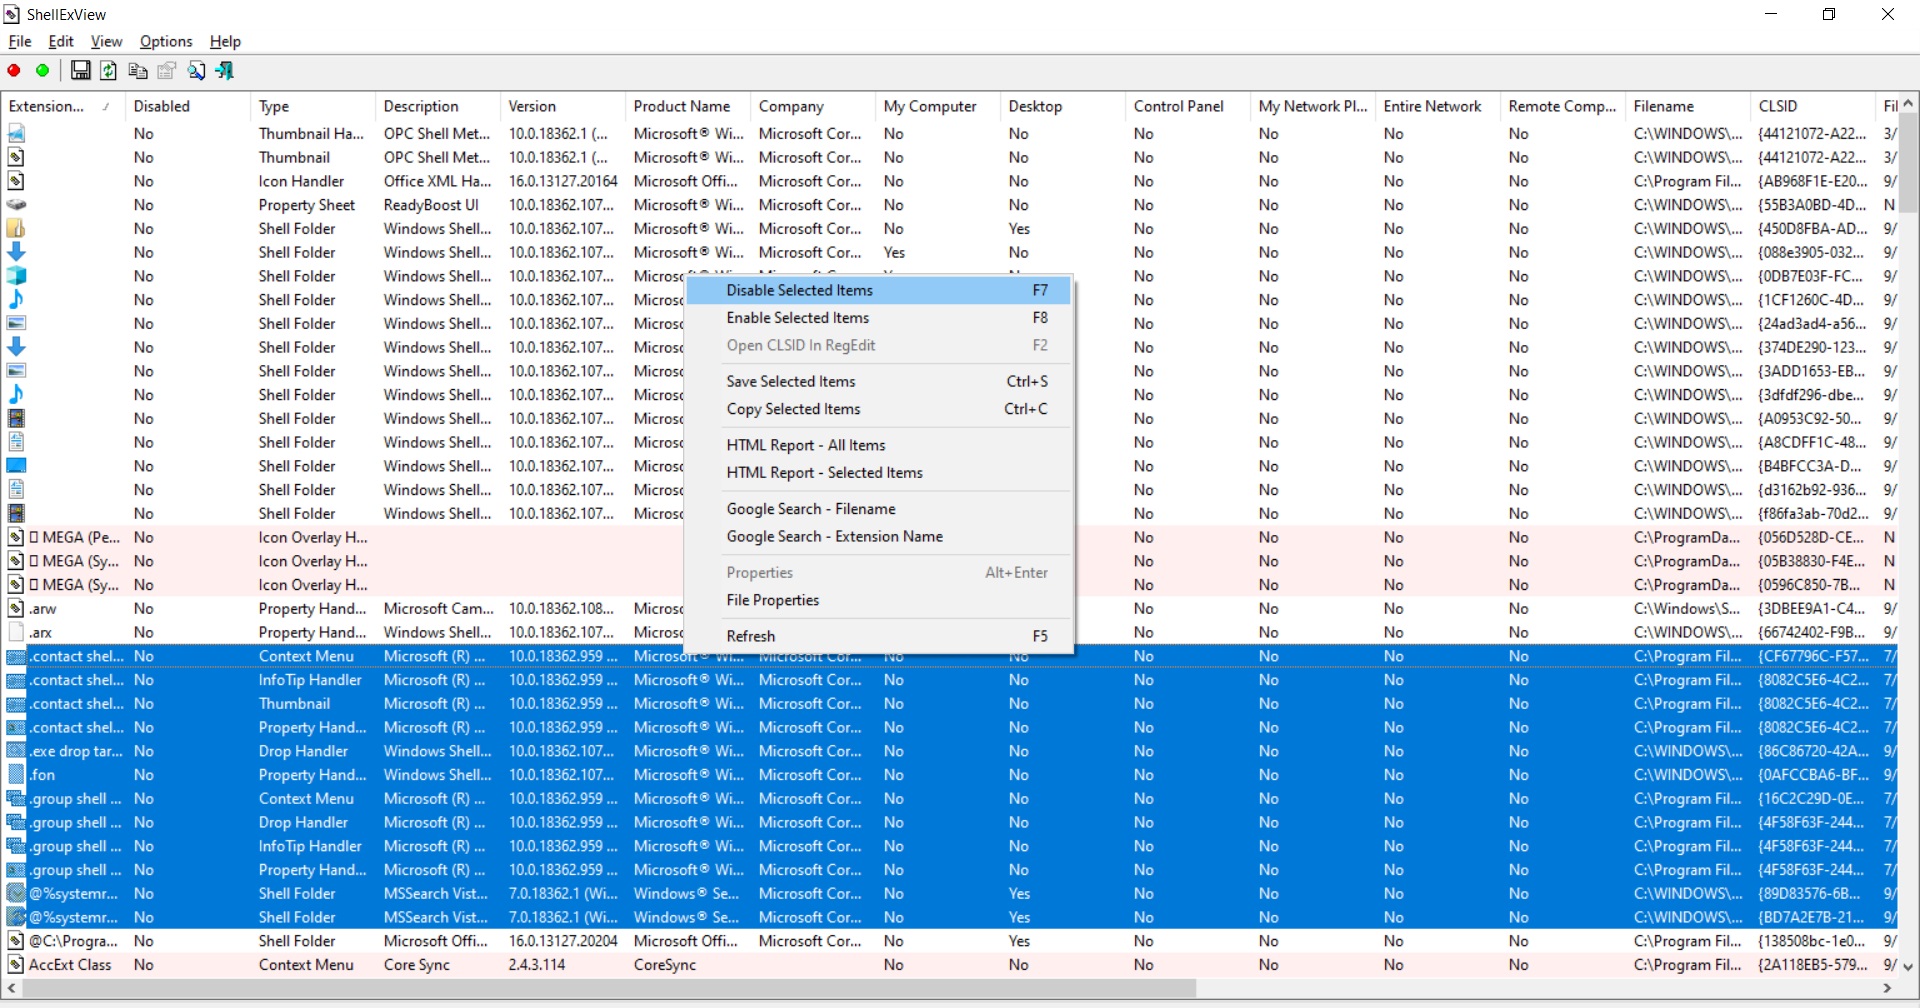
Understanding the Interface
The main window is a sortable list with these important columns:
- Extension Name — The display name registered by the software
- Disabled — Shows “Yes” if you have disabled this extension
- Type — The category: Context Menu, Icon Handler, Property Sheet, Thumbnail Handler, etc.
- Filename — Full path to the DLL or EXE file providing this extension
- Company — The publisher name from the file’s version information
- Digital Signature — Whether the file has a valid code signature
Click any column header to sort. Click it again to reverse the sort order. This is the fastest way to group extensions by company or type.
The first thing most users do is hide built-in Windows extensions. Go to Options > Hide All Microsoft Extensions (or press Ctrl+H). This filters the list to only third-party extensions — the ones most likely to cause problems.
Extensions highlighted in pink have file-related anomalies: missing DLLs, unsigned code, or version mismatches. These are worth investigating first when troubleshooting.
Disabling Problematic Extensions
This is the core workflow. If your right-click menu is slow, Explorer crashes, or you see unwanted entries in context menus, the process is:
- Hide Microsoft extensions using Options > Hide All Microsoft Extensions
- Sort by Type column and look at “Context Menu” entries
- Select a suspicious extension (one from a program you no longer use, or one highlighted in pink)
- Press F7 to disable it, or right-click and choose Disable Selected Items
- Go to Options > Restart Explorer to apply the change
- Test your right-click menu. If the problem is gone, you found the culprit. If not, re-enable that extension (F8) and try the next one.
You can select multiple extensions at once using Ctrl+click or Shift+click and disable them all in one batch. This is faster when you have many third-party extensions to test.
Tips and Best Practices
After using ShellExView on dozens of systems, a few patterns emerge. Here are the most useful ones:
- Common offenders: Cloud sync clients (Dropbox, OneDrive, Google Drive), antivirus right-click scanners, NVIDIA/AMD control panel entries, and outdated printer drivers are the most frequent causes of slow context menus.
- Use command-line for automation: Run
shexview.exe /disable "Extension Name"to disable an extension from a batch file or login script. Pair it with/scomma output.csvto export data. - Keep it on a USB drive: Since ShellExView is portable and under 150 KB, it fits on any USB stick. IT technicians often keep it alongside other NirSoft tools for on-the-spot troubleshooting.
- Check after Windows updates: Major Windows updates sometimes re-register shell extensions or add new ones. Running ShellExView after a big update helps you catch unwanted additions early.
- Remote scanning: Use File > Open Remote Computer to inspect extensions on another networked PC. Requires admin credentials for the target machine.
For more detail on each feature, check the features section or browse the FAQ below.
Frequently Asked Questions
Answers to the most common questions about ShellExView, from safety to advanced usage.
Is ShellExView safe to download and use?
Yes, ShellExView is safe. It has been developed and maintained by Nir Sofer at NirSoft since the early 2000s. NirSoft is one of the most established publishers of free Windows system utilities, with dozens of tools recommended by Microsoft MVPs, IT professionals, and publications like Lifehacker, How-To Geek, and Bleeping Computer.
The program does not modify system files, install drivers, or phone home to any server. It reads shell extension data from the Windows registry and displays it. When you disable an extension, ShellExView writes a single registry value that tells Windows to skip loading that extension — the original DLL file remains untouched. Re-enabling an extension removes that registry entry, restoring the original state.
Some antivirus programs flag NirSoft tools as “potentially unwanted” because of their system-level capabilities (reading passwords, registry keys, etc.). These are false positives. NirSoft publishes MD5/SHA hashes for every download on their site so you can verify file integrity.
Pro tip: Always download from the official NirSoft website or from our download section which links directly to NirSoft. Avoid third-party download sites that may bundle adware with the installer.
Does ShellExView work on Windows 11?
Yes, ShellExView v2.01 works on Windows 11 including the latest 24H2 update. Use the 64-bit version for full coverage of both 64-bit and 32-bit shell extensions on your system.
Windows 11 introduced a new right-click context menu that shows a simplified set of options, with “Show more options” at the bottom to access the classic full menu. ShellExView manages the extensions behind both menus. If you are trying to clean up entries from the classic context menu (the one that appears after clicking “Show more options”), ShellExView handles that directly. For the new simplified Windows 11 menu, the entries are controlled differently through the registry, but ShellExView still covers the underlying shell extension handlers.
If you want to force Windows 11 to always show the classic full context menu instead of the simplified version, that requires a separate registry tweak (adding a key under HKCU\Software\Classes\CLSID). ShellExView does not do this automatically, but once the classic menu is active, it manages all the entries within it.
Pro tip: On Windows 11, run ShellExView as administrator by right-clicking the executable and selecting “Run as administrator” or by setting compatibility properties. The UAC prompt is required for modifying extension states.
Is ShellExView free to download?
Yes, ShellExView is 100% freeware. There is no paid version, no premium tier, no trial period, and no feature restrictions. You can use it on personal and commercial systems without any licensing cost.
NirSoft funds its development through donations and advertising on the NirSoft website. The software itself contains no ads, no telemetry, and no bundled offers. The ZIP download includes only the executable and help file — nothing else.
There are no registration keys, activation codes, or accounts to create. Download, extract, run. If you find ShellExView useful, NirSoft accepts voluntary donations through their website, but this is entirely optional and does not affect functionality.
How do I fix a slow right-click context menu with ShellExView?
A slow right-click menu is almost always caused by a shell extension that hangs while loading. ShellExView is the most effective tool for finding and disabling the responsible extension. Here is the step-by-step process:
- Download and open ShellExView as administrator from our download section
- Click Options > Hide All Microsoft Extensions to focus on third-party additions
- Sort the list by the Type column and look for entries labeled “Context Menu”
- Select all third-party context menu extensions (Ctrl+A after filtering, or Shift+click a range)
- Press F7 to disable them all at once
- Click Options > Restart Explorer
- Right-click a file in Explorer. If the menu is now fast, one of those disabled extensions was the problem.
- Re-enable them one at a time (select, press F8, restart Explorer, test) until the slowness returns. That extension is the culprit.
Common offenders include cloud storage sync clients (Dropbox, Google Drive, OneDrive icon overlays), antivirus right-click scan options, NVIDIA/AMD control panel entries, and tools from software you uninstalled but that left their shell extensions behind.
Pro tip: Icon overlay handlers can also cause slowdowns even though they are not context menu items. Windows has a hard limit of 15 icon overlays, and exceeding it causes delays. Sort by Type and check how many “Icon Overlay Handler” entries are active.
What is a shell extension?
A shell extension is a small piece of software (usually a DLL file) that plugs into Windows Explorer to extend its functionality. When you install an application, it can register one or more shell extensions that change how Explorer behaves — adding items to the right-click menu, displaying custom thumbnails, modifying property dialogs, or overlaying icons on files.
Windows supports over 22 types of shell extensions, including:
- Context Menu Handlers — Add items to the right-click menu (most common type)
- Icon Overlay Handlers — Add small overlay icons on files/folders (like the Dropbox sync checkmark)
- Property Sheet Handlers — Add tabs to the file Properties dialog
- Thumbnail Handlers — Generate preview thumbnails for specific file types
- Preview Handlers — Display file previews in the Explorer preview pane
- Drag-and-Drop Handlers — Modify what happens when you drag files
- Column Handlers — Add columns to the Details view
The issue is that Windows loads these extensions every time you interact with Explorer. A single badly coded extension can slow down your entire file browsing experience or cause Explorer to crash. ShellExView makes these invisible extensions visible so you can manage them.
Can ShellExView fix Windows Explorer crashes?
Yes, and this is one of its most common uses. Explorer crashes and the “Windows Explorer has stopped working” error are frequently caused by a faulty shell extension. When Explorer loads a broken or incompatible DLL, it can trigger an access violation that brings down the entire Explorer process.
To find the crashing extension:
- Open ShellExView as administrator
- Look for extensions highlighted in pink — these have file anomalies and are prime suspects
- Hide Microsoft extensions and check for outdated third-party entries (look at the Version column for old version numbers)
- Disable any suspicious extensions one at a time, restart Explorer, and test stability
If Explorer crashes immediately when you open certain folders, the problem is likely a thumbnail or preview handler extension. Disable all thumbnail and preview handlers, restart Explorer, and then re-enable them one by one.
Pro tip: Check Windows Event Viewer (eventvwr.msc) for the faulting module name in Explorer crash logs. Search for that DLL filename in ShellExView to find the exact extension responsible. This can save time over the trial-and-error approach.
For a full walkthrough, see our Getting Started guide.
What is the difference between the 32-bit and 64-bit versions?
The 64-bit version of ShellExView (shexview-x64.zip, ~140 KB) runs natively on 64-bit Windows and can display both 64-bit and 32-bit shell extensions. The 32-bit version (shexview.zip, ~120 KB) runs on both 32-bit and 64-bit Windows but can only see 32-bit extensions.
On a modern 64-bit Windows 10 or 11 system, most shell extensions are 64-bit. However, some older applications install 32-bit extensions that run under the WoW64 compatibility layer. The 64-bit version of ShellExView shows both types in a single list, so it gives you the most complete picture.
Use the 32-bit version only if you are running a 32-bit copy of Windows (increasingly rare) or if you specifically need to troubleshoot 32-bit shell extensions in isolation on a 64-bit system.
Pro tip: If you are unsure which to pick, go with 64-bit. It covers everything the 32-bit version does and more. Check your system type by pressing Win+Pause or going to Settings > System > About.
How to disable context menu items with ShellExView?
Removing unwanted items from the Windows right-click menu is ShellExView’s primary use case. The process takes under a minute:
- Open ShellExView as administrator
- Click the Type column header to sort by extension type
- Scroll down to entries labeled Context Menu
- Find the entry matching the menu item you want to remove (the Extension Name or Company column usually makes it clear)
- Select the entry and press F7 (or right-click > Disable Selected Items)
- Go to Options > Restart Explorer
The unwanted context menu item will disappear. If you change your mind, open ShellExView again, find the disabled entry (it will show “Yes” in the Disabled column), select it, and press F8 to re-enable it.
Note that ShellExView manages dynamic context menu extensions (DLLs). Some context menu entries are static (simple registry-based entries). For static entries, use NirSoft’s companion tool ShellMenuView instead.
Pro tip: To identify which extension adds a specific right-click option, right-click a file in Explorer while ShellExView is open. Then in ShellExView, look at the “Microsoft Loaded” column — extensions with a recent timestamp were just loaded for that context menu.
How to restore disabled extensions in ShellExView?
Re-enabling a disabled extension is simple. Open ShellExView, sort or filter the list to find entries where the Disabled column shows “Yes,” select the extension you want to restore, and press F8 (or right-click > Enable Selected Items). Then restart Explorer via Options > Restart Explorer for the change to take effect.
If you need to restore all disabled extensions at once, press Ctrl+A to select everything, then press F8. This re-enables every extension in the list, including ones that were already enabled (pressing F8 on an enabled extension does nothing, so it is safe).
Disabled extensions are not deleted or modified in any way. ShellExView simply writes a registry value that tells Windows to skip loading them. Removing that registry value (which is what F8 does) fully restores the extension to its original state.
Pro tip: Before making changes, export your current configuration using File > Save Selected Items or View > HTML Report. This gives you a snapshot you can reference if you forget which extensions you disabled.
ShellExView vs ShellMenuView – what is the difference?
Both tools are made by NirSoft and both deal with the right-click context menu, but they target different types of menu entries.
ShellExView manages dynamic shell extensions — DLL files registered as COM objects that inject code into Explorer at runtime. These are the more complex (and more problematic) type of context menu handler. They run executable code every time you right-click and can cause slowdowns, crashes, and instability if poorly written.
ShellMenuView manages static context menu entries — simple registry-based shortcuts that appear in the right-click menu without running any code. These are lightweight entries like “Open with Notepad++” or “Edit with VS Code.” They rarely cause problems but can clutter the menu.
In practice, you often need both tools for a complete context menu cleanup:
- Use ShellExView first to disable problematic dynamic extensions (the ones causing slowness or crashes)
- Use ShellMenuView to remove clutter from static entries that are not causing performance issues but just taking up space
Pro tip: If your right-click menu is slow, the problem is almost always a dynamic extension (ShellExView territory). If the menu appears instantly but just has too many items, use ShellMenuView to trim the static entries.
Does ShellExView require administrator privileges?
On Windows Vista, 7, 8, 10, and 11 — yes, administrator privileges are required for full functionality. ShellExView needs to read and write to registry keys under HKEY_LOCAL_MACHINE and HKEY_CLASSES_ROOT, which are protected areas that require elevated permissions.
If you run ShellExView without administrator rights, it will still open and display the list of shell extensions. However, you will not be able to disable or enable any extensions, and some information (like certain file paths and registry data) may be incomplete.
To run as administrator: right-click shexview.exe and select Run as administrator. If you use ShellExView frequently, you can set it to always run elevated: right-click the file > Properties > Compatibility tab > check “Run this program as an administrator.”
On Windows XP and earlier, administrator privileges are not enforced by the OS in the same way, so ShellExView runs with full access for any admin-level user account.
How to use ShellExView on a remote computer?
ShellExView can scan and manage shell extensions on other Windows computers across your local network. This is useful for IT administrators who need to troubleshoot Explorer issues on employee workstations without physically going to each machine.
To connect to a remote computer:
- Open ShellExView on your local machine (as administrator)
- Go to File > Open Remote Computer
- Enter the remote computer’s hostname or IP address
- If prompted, provide administrator credentials for the remote machine
- ShellExView will scan and display the remote system’s shell extensions
The remote computer must have the “Remote Registry” service running and Windows file sharing enabled. Both machines must be on the same network or connected via VPN. Windows Firewall may need an exception for remote registry access.
You can also use the command line for remote scans: shexview.exe /remote \\ComputerName
Pro tip: For large-scale deployments, combine remote scanning with the CSV export option to build an inventory of shell extensions across your entire network. Run a batch script that iterates through a list of hostnames and exports each machine’s data to a separate file.
How to identify problematic shell extensions?
ShellExView gives you several indicators to spot extensions that are likely causing problems:
- Pink highlighting — Extensions with missing files, unsigned code, or file attribute anomalies are automatically highlighted. Check these first.
- Missing files — If the Filename column shows a path to a DLL that no longer exists (because you uninstalled the parent application), that extension is orphaned and safe to disable.
- No digital signature — Extensions without valid signatures from known publishers are higher risk. Check the Digital Signature column.
- Old version numbers — Extensions with very old version numbers (especially from companies that have released newer versions) may be outdated and incompatible.
- Unknown companies — If the Company column is empty or shows an unfamiliar name, investigate further before trusting that extension.
For context menu slowness specifically, sort by Type, filter to “Context Menu” entries, and disable all non-Microsoft ones. Then re-enable them one by one, restarting Explorer each time, until the slowness returns. The last re-enabled extension is the culprit.
Pro tip: Cross-reference suspicious extensions with their parent application. If you uninstalled a program but its shell extension is still registered, that is a cleanup failure — disable or leave it disabled. The parent application’s uninstaller should have removed it.
See our Getting Started guide for detailed troubleshooting steps.
How to use ShellExView command line?
ShellExView has a full command-line interface for automating tasks without opening the GUI. This is useful for batch scripts, GPO login scripts, and IT maintenance routines.
Common command-line operations:
- Disable an extension:
shexview.exe /disable "Extension Name" - Enable an extension:
shexview.exe /enable "Extension Name" - Export to CSV:
shexview.exe /scomma output.csv - Export to HTML:
shexview.exe /shtml output.html - Export to XML:
shexview.exe /sxml output.xml - Remote scan:
shexview.exe /remote \\PCName /scomma remote_output.csv
You can also use the CLSID instead of the extension name for precision: shexview.exe /disable "{CLSID-GUID-HERE}"
Pro tip: Combine command-line disable/enable with a list of known problematic CLSIDs to create a standard cleanup script for new PC deployments. Run it as part of your provisioning process to disable bloatware shell extensions before the user logs in.
How to update ShellExView to the latest version?
ShellExView does not have an auto-update feature. To update, download the latest version from our download section and extract it over the existing files. Since ShellExView is portable and stores no configuration in the registry, updating is as simple as replacing the old executable with the new one.
The current version is 2.01. NirSoft releases updates infrequently because the tool is mature and stable — shell extension APIs have not changed significantly in recent Windows versions, so v2.01 works well across Windows XP through Windows 11.
To check which version you are running, open ShellExView and go to Help > About. The version number is displayed in the title bar as well.
Pro tip: Bookmark the NirSoft ShellExView page or subscribe to the NirSoft RSS feed to get notified of new releases. Updates are rare but occasionally include support for new shell extension types introduced in major Windows updates.
ShellExView vs Autoruns – which should I use?
Both are excellent system inspection tools, but they serve different purposes. ShellExView is a specialist — it focuses exclusively on shell extensions and gives you deep detail about each one. Autoruns (from Sysinternals/Microsoft) is a generalist — it shows everything that auto-starts on your system, including services, drivers, scheduled tasks, codecs, and yes, shell extensions too.
Key differences:
- Depth vs. breadth: ShellExView shows more detail about each shell extension (22+ types, company info, digital signatures, file attributes). Autoruns covers shell extensions as one tab among many and shows less detail per entry.
- Use case: If your problem is specifically a slow right-click menu or Explorer crashes, ShellExView is faster and more focused. If you are doing a full system audit of everything that auto-starts, Autoruns is the better tool.
- Remote access: Both support remote computer scanning, but ShellExView’s remote scanning is simpler to set up for shell-extension-specific tasks.
- Size: ShellExView is under 150 KB. Autoruns is about 2 MB. Both are portable.
Many sysadmins keep both tools on their USB drive. Start with ShellExView for context menu and Explorer issues, then use Autoruns for broader startup analysis.
Pro tip: Autoruns can also disable shell extensions, but ShellExView’s filtering (hide Microsoft, sort by type) makes the process much faster when you are troubleshooting a specific Explorer issue.
Where is the official download for ShellExView?
The official download source for ShellExView is the NirSoft website at nirsoft.net/utils/shexview.html. Both 32-bit and 64-bit versions are available as direct ZIP downloads with no installer or signup required.
You can also download both versions directly from our download section, which links to the official NirSoft files. We do not repackage, modify, or host the files ourselves — the links go straight to NirSoft’s servers.
Avoid downloading ShellExView from third-party software aggregation sites (Softonic, CNET Download, etc.) as some of these sites wrap NirSoft utilities in custom installers that may include adware, toolbars, or unwanted bundled software. The official NirSoft download is always a clean ZIP archive with no bundled extras.
Pro tip: NirSoft publishes MD5 and SHA256 hashes for each download on their web page. After downloading, you can verify the file integrity with PowerShell: Get-FileHash shexview.zip -Algorithm SHA256 and compare the output to the hash listed on the NirSoft page.
How to uninstall ShellExView completely?
Since ShellExView is a portable application, there is nothing to uninstall in the traditional sense. It does not write to the registry (beyond the disable/enable flags for shell extensions you modify), does not install services, and does not create Start Menu shortcuts.
To remove ShellExView completely:
- Re-enable any disabled extensions — Open ShellExView, select all items, press F8 to enable everything, then restart Explorer
- Delete the folder — Delete the folder where you extracted ShellExView (e.g., C:\Tools\ShellExView\)
- That is it. There are no leftover files, services, or registry entries from the tool itself.
The only traces ShellExView leaves on a system are the disable flags it writes for extensions you chose to disable. If you re-enable everything before deleting the tool, the system returns to its original state. If you deleted ShellExView without re-enabling, the disabled extensions stay disabled — you would need to re-download ShellExView to re-enable them, or manually remove the disable flags from the registry.
Does ShellExView work offline?
Yes, ShellExView works entirely offline. It does not require an internet connection for any of its core functions: scanning extensions, disabling/enabling them, exporting data, or restarting Explorer. The tool reads all information directly from the local Windows registry and file system.
The only feature that requires network access is the remote computer scanning option (File > Open Remote Computer), which connects to other Windows machines on your LAN. Everything else is 100% local.
ShellExView does not check for updates, send telemetry, validate licenses, or communicate with any server. You can use it on air-gapped systems, in secure environments, or on machines with no internet access without any limitations.
Pro tip: This offline capability makes ShellExView ideal for technicians who carry it on a USB drive. You can plug the drive into any Windows PC — even one without internet — and immediately diagnose shell extension problems.
Can I export shell extension data to a file?
Yes, ShellExView supports exporting the full extension list in five different formats: CSV (comma-separated), tab-delimited text, XML, HTML report, and JSON. Each format captures all columns visible in the interface, including extension name, type, CLSID, filename, company, version, and status.
To export from the GUI:
- Select the items you want to export (or press Ctrl+A for all)
- Go to File > Save Selected Items
- Choose the file format and save location
For an HTML report that looks like a formatted web page, go to View > HTML Report – All Items (or Selected Items). This creates a nicely formatted table you can open in any browser.
From the command line, use these flags for automated exports:
- CSV:
shexview.exe /scomma output.csv - Tab-delimited:
shexview.exe /stab output.txt - HTML:
shexview.exe /shtml output.html - XML:
shexview.exe /sxml output.xml
Pro tip: Schedule a weekly CSV export via Task Scheduler to track changes in shell extensions over time. Compare exports to detect when new extensions are installed or existing ones are modified — useful for security monitoring.